
The initial problems were not an end to the woes, so no worries if you're still reading this feeling overwhelmed. As promised, we'll go through each step of the workflow and translate it to a command, assuming that the right software is installed.
Finding the fastq files in the Sequence Read Archive (SRA)
Downloading the files might seem like the easiest part in the bioinformatic analysis, but even in this step, there are a few important roadblocks that I noticed (and you might later).
First, in reading the paper to try to find where the raw sequence data is, we get the following:
The sequencing data have been deposited in NCBI Sequence Read Archive (SRA, http://www.ncbi.nlm.nih.gov/Traces/sra) and the accession number is SRA062881.
Seems easy enough, right? But when we go to the SRA Run Selector provided by NCBI, we get the following message when we input this accession number:

Which is a bummer. How are we supposed to get the data? We could email the authors (I tried emailing the authors about this paper and have yet to receive a response). Or we could keep looking ourselves. We'll take the authors' word for it that they did actually deposit these samples to SRA, and they're just misplaced. So let's use the "Browse" feature on the much-less-recently updated bit of the SRA website:
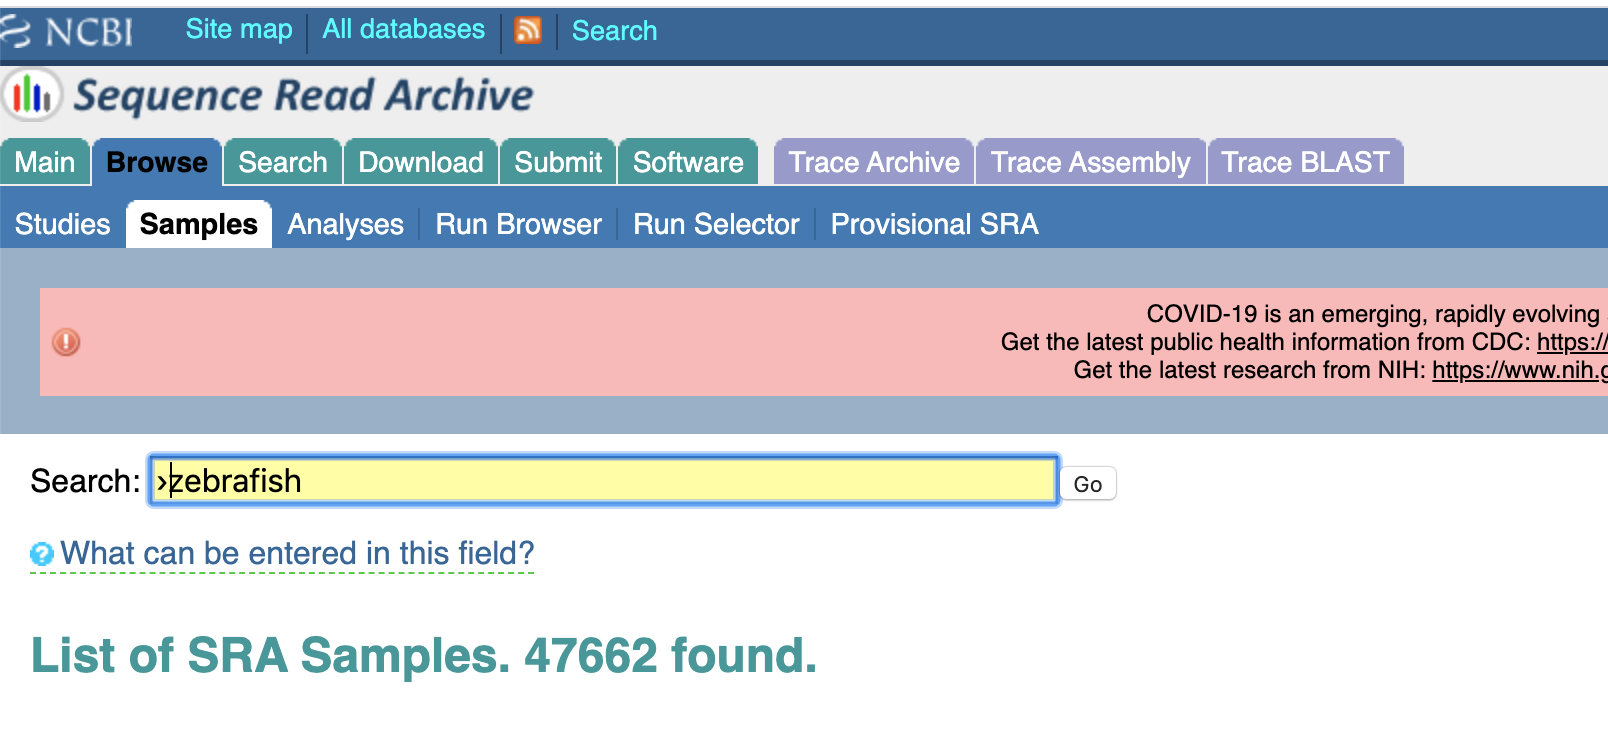
So now we have some zebrafish samples, but 47,662 is a few too many than I have time to go through. Lets add a couple more keywords:
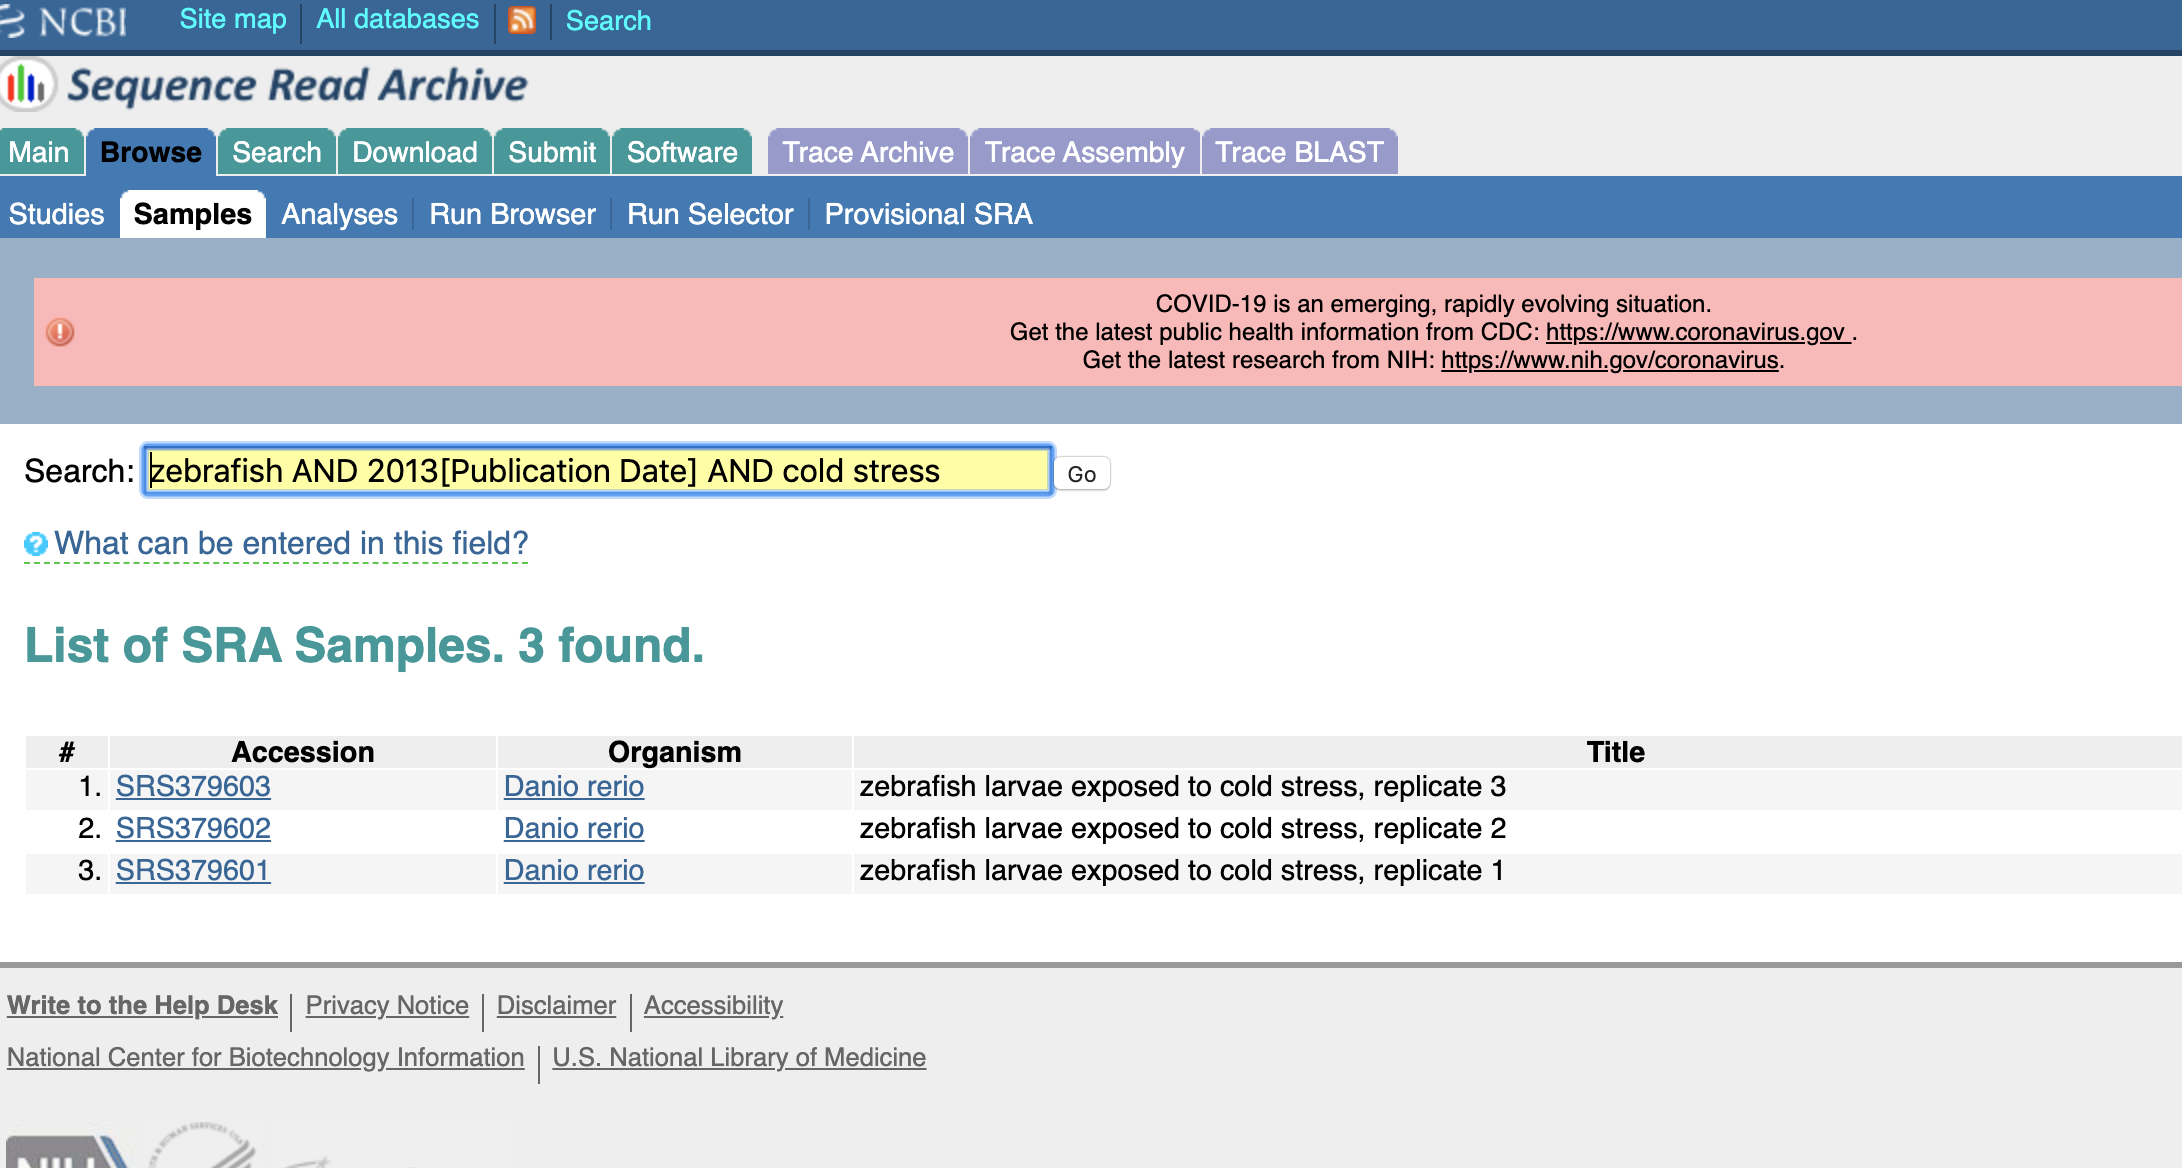
And voilà! There is our experiment!
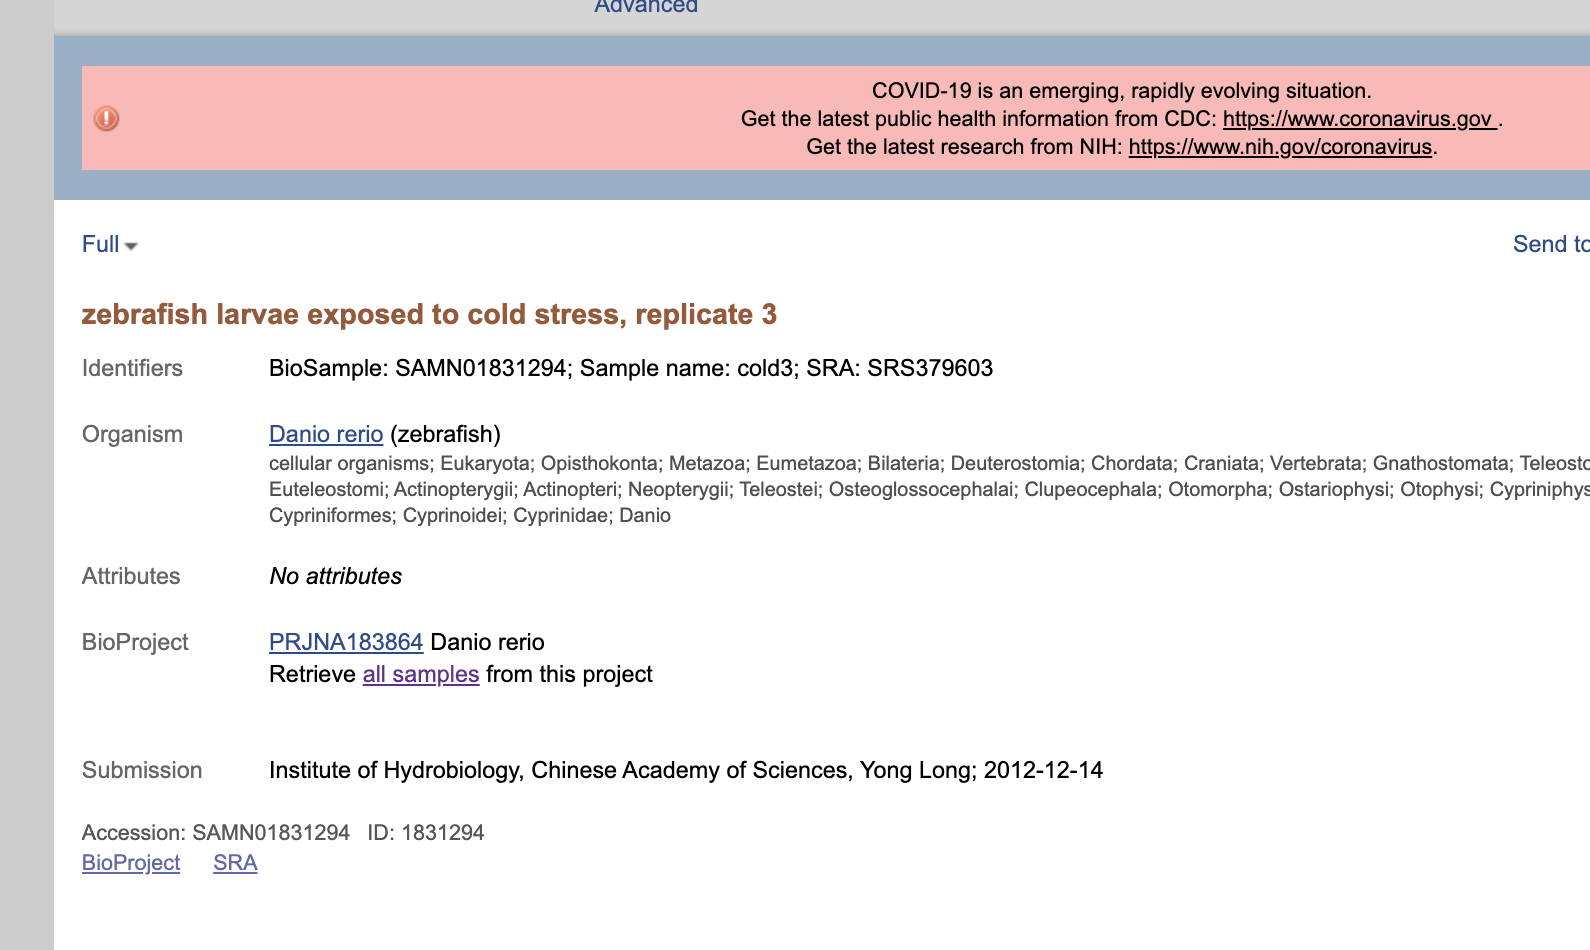
(you'll notice that all the metadata lines up here, but the SRA number is...not similar. Many things could have happened here. Maybe the SRA changed the accession number for some reason, they got the initial accession wrong, there are different accession numbers in different localities...we'll give the benefit of the doubt here.)
So now we can click the link inviting us to retrieve all samples, or we can go back to our handy dandy "Run Selector", which is my interface of choice, and grab the list of accession numbers we need. All we need to do for this is pop that project number we found back into the search box:
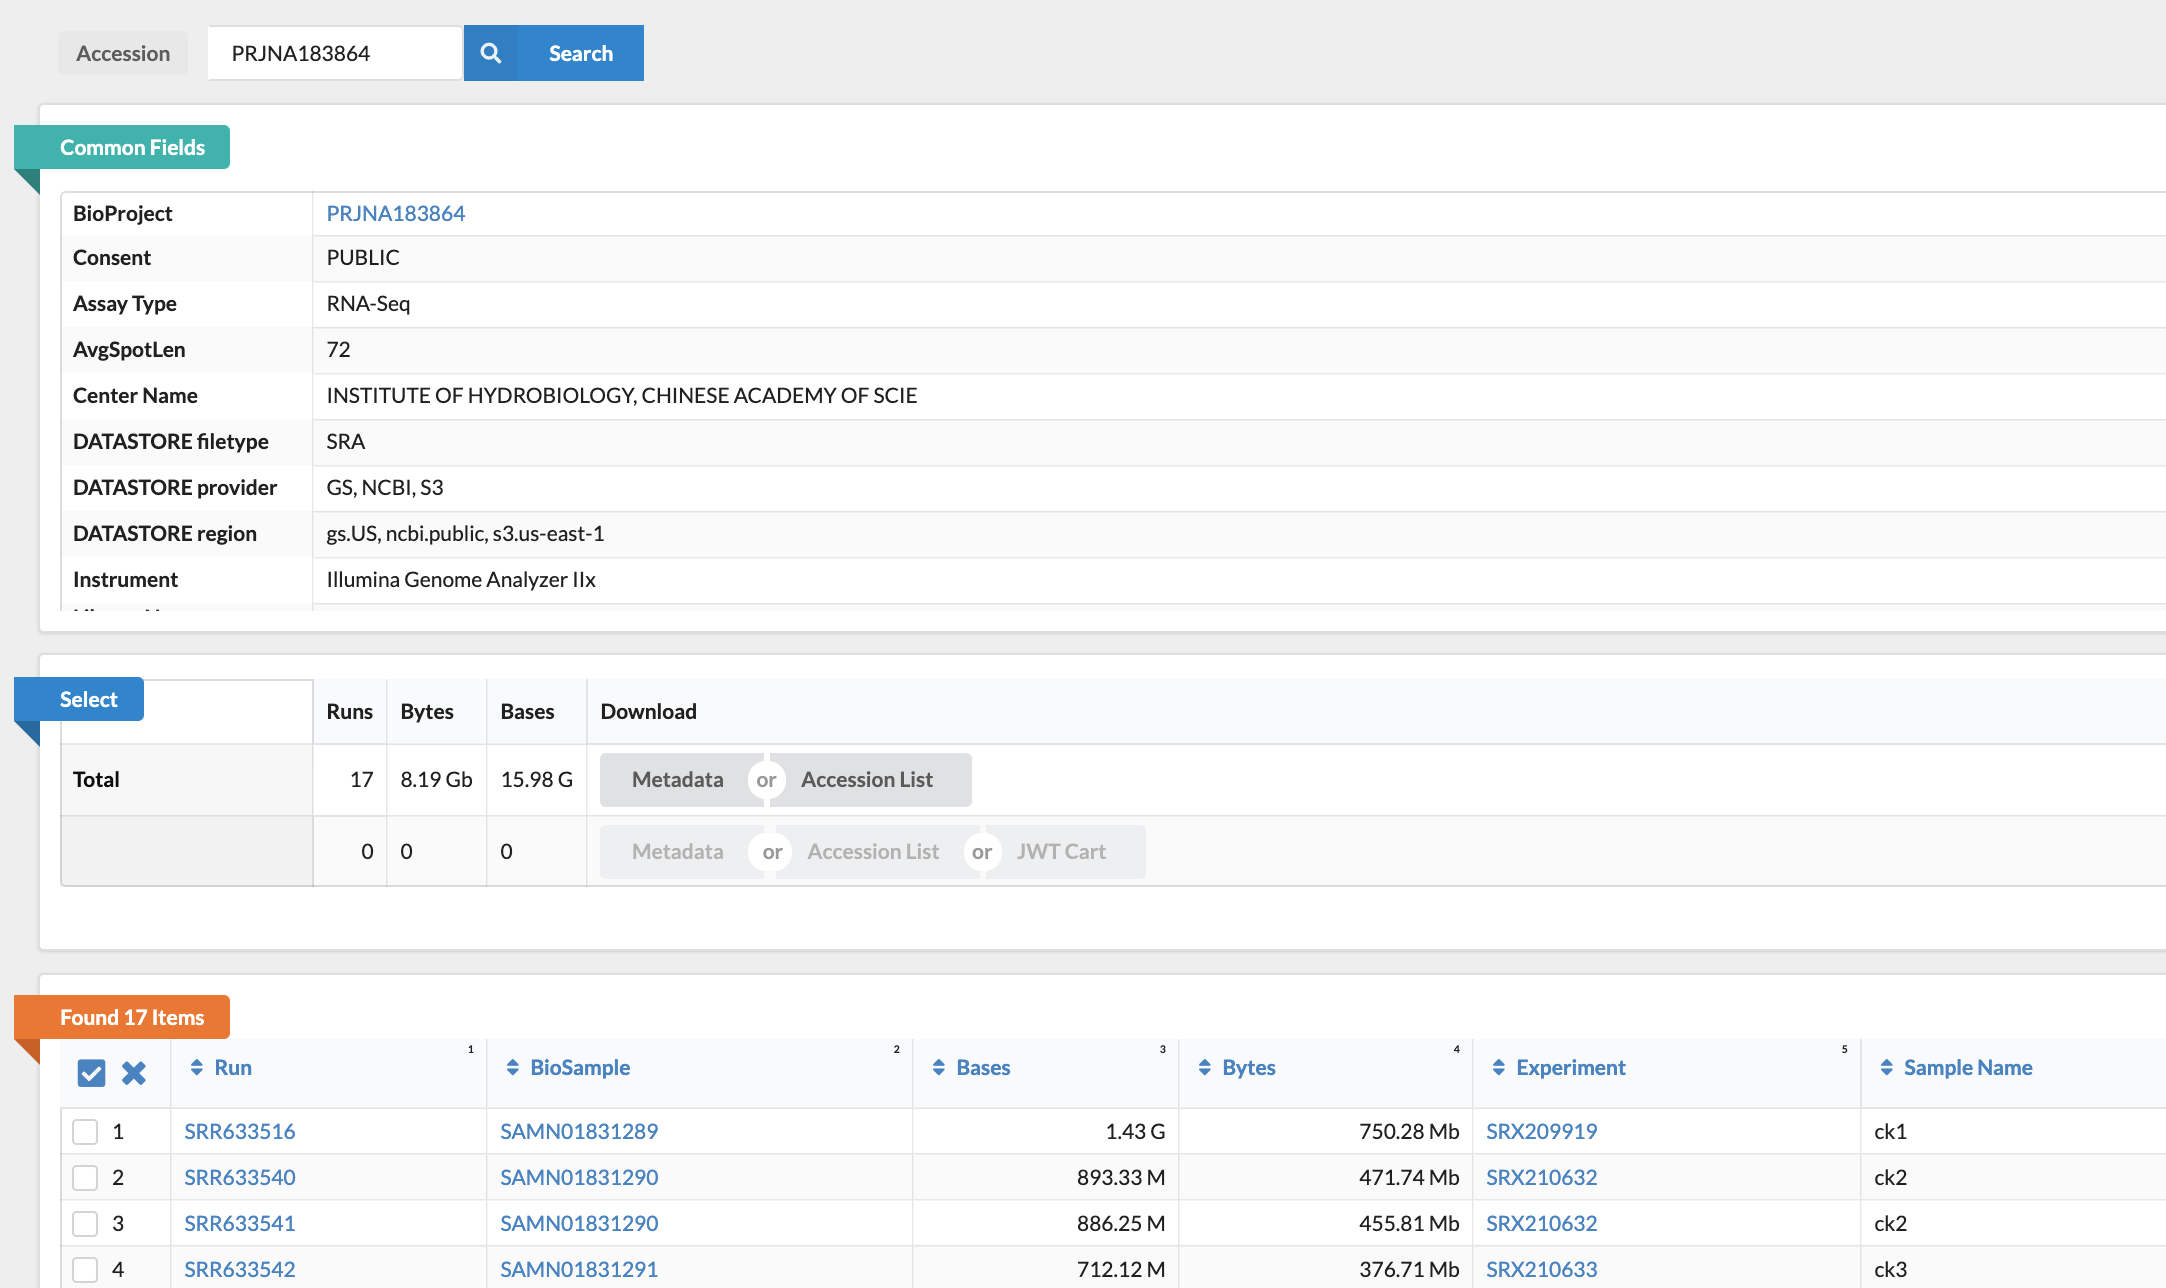
You'll notice they also got some data on hypoxia, but with the selector we can just pick the treatments we need, then download both a plain text accession list and some comma-separated metadata about each of the experiments, in that center box under "Select". Now we're set to go! From here on out, we won't need to interface with any downloading websites, and we can use the package sra-tools to talk to the NCBI site. Phew.
Downloading the fastq files from the Sequence Read Archive
Here's where we're going to start our bash script. You'll remember from before that we have a few things we need to take care of in the header:
#!/bin/bash
#SBATCH --partition=scavenger
#SBATCH --qos=unlim
#SBATCH --time=10000
#SBATCH --mem=180gb
#SBATCH -n 8
Everything in that snippet is subject to change except for the first line, which is what signals that we're using bash. The other lines are describing what resources we want to demand of our HPC system.
Reminder: the full bash file is available in the GitHub repository, under scripts/workflow.sh.
Using the downloaded SRA numbers that we just found on the NCBI website, we'll create a bash vector to hold the IDs, so that we can iterate over them, and do the same thing for each experiment file.
# Array of accession numbers for the zebrafish experiment
zebrafishaccessions="SRR633516 SRR633540 SRR633541 SRR633542 SRR633543 SRR633549 SRR633548 SRR633547 SRR633546 SRR633544 SRR633545"
Next, we need to loop over all of the accession numbers, and for each number, download the associated fastq file from the SRA. Because we want this to run as quickly as possible, we're going to use bash to run these tasks in the background. On a Unix system, the symbol & at the end of a command signifies that we want the computer to work on the task whenever it can, but we don't want it to stop us from continuing to issue commands to the computer (commands issued in the foreground. So we write a function that contains the tasks we need to perform, and then we run instances of that function in the background. Here's the function:
workflow () {
    local f=$1
    fastq-dump "$f" --split-files -O ~/ncbi_bvcn -I -F
    sed -i '/^+HW/ s/$/\/1/' ~/ncbi_bvcn/"$f"_1.fastq
    sed -i '/^+HW/ s/$/\/2/' ~/ncbi_bvcn/"$f"_2.fastq
    sed -i '/^@HW/ s/$/\/1/' ~/ncbi_bvcn/"$f"_1.fastq
    sed -i '/^@HW/ s/$/\/2/' ~/ncbi_bvcn/"$f"_2.fastq
}
The first line in the function takes the first argument to the function and stores it in the variable f. You'll notice this is a little complicated. It won't be quite clear why there are 5 lines here instead of one. The first line,
fastq-dump "$f" --split-files -O ~/ncbi_bvcn -I -F
is the "unload" command from sra-tools, which is just the basic command for downloading fastq files from SRA. the -O flag tells the software where to store the output, in this case a folder called ncbi-bvcn in our home directory, --split-files means to not concatenated paired-end read files, -I means to label the identifiers with their read IDs, and the -F means to use the original header format as given in the file originally uploaded to SRA.
For some of the tools we'll use downstream, we'll need to have each line of each read file labeled with /X, where "X" is the direction of the read. So the next four lines add those identifiers to both the nucleotide sequence and the quality headers, since we're using fastq files, which include both the nucleotides of the sequences and the quality score associated with each nucleotide. PRINSEQ, a tool we'll use later, requires that we add this identifier to both the "+" and the "@" lines. So we comply.
In order to run this for all the files, we use the loop:
for f in $zebrafishaccessions
do
    workflow "$f" &
done
Remembering to add & so we can run this time-intensive, but basic task in the background.
Diving in: the pipelining
Trimming and filtering with PRINSEQ
This is how the paper describes the trimming and filtering process:
The raw reads were trimmed and filtered using PRINSEQ (version 0.19.3) [74]. Low quality (Q < 20) and ambiguous bases (N) were first trimmed from both ends of the reads and the trimmed reads were filtered with Phred quality score (Q ≥ 20 for all bases) and read length (≥ 25 bp).
We can use the same loop and add to the same function as before, or we could create a new loop. We'll keep everything separate for now:
workflow() {
    local f = $1
    # Trim using PRINSEQ
    prinseq-lite.pl -fastq ~/ncbi_bvcn/"$f"_1.fastq -fastq2 ~/ncbi_bvcn/"$f"_2.fastq -trim_ns_left 1 -trim_ns_right 1 -min_qual_score 20 -trim_qual_left 20 -trim_qual_right 20 -trim_qual_type min -min_len 25 -out_good ~/ncbi_bvcn/"$f"_prinseq -out_format 3
}
That's a lot of parameters. And what did the authors mean when they were describing all those pieces? Looking at the PRINSEQ manual, we see that there are parameter sets for trimming and parameter sets for trimming. First, we find the trimming parameters:
Trimming
Low quality (Q < 20) and ambiguous bases (N) were first trimmed from both ends of the reads
-trim_ns_left: trim from the left end of the read (boolean)-trim_ns_right: trim from the right end of the read (boolean)-trim_qual_left: quality score threshold for the left end trimming-trim_qual_right: quality score threshold for the right end trimming-trim_qual_type: what function to use for the cutoff threshold (here, this is minimum quality score)
Filtering
trimmed reads were filtered with Phred quality score (Q ≥ 20 for all bases) and read length (≥ 25 bp)
-min_qual_score: minimum quality score to use for filtering-min_len: the minimum length to retain during filtering
Finally, we just choose that we want a fastq file as output with -out_format, and we select a name for the output directory for the reads that have made it through our vetting process (-out_good).
Checking quality with cmpfastq
The point of cmpfastq is only to compare quality-assessed fasta files. It's relatively self-explanatory, but the easiest way to use it is to just download the Perl script, add it's location to your PATH, or just keep it in the same folder where you plan to run it. Then, you can run the following code:
workflow() {
    local f = $1
    # quality statistics using cmpfastq
    perl cmpfastq "$f"_prinseq_1.fastq  "$f"_prinseq_2.fastq > "$f"_cmpfastq.txt
    echo process cmpfastq complete for "$f"
}
Mapping to the genome with TopHat
TopHat is a splice junction mapper that maps RNA-seq reads back to a genome, also examining splice sites at exons. TopHat is no longer being maintained, which makes it a little difficult to work with. That's why we ended up having to use a slightly different version when we were creating our conda environment (so when you're writing up a new project, don't use TopHat anymore...but it was still popular in many spheres when this paper was published).
Briefly, the preprocessed reads were mapped to the genome sequence of zebrafish (Zv9.68) using TopHat (version 2.0.4) [75] with default parameters except “--segment-mismatches 1” and “--segment-length 18”.
So here, we need to create a Bowtie index for the reference genome for zebrafish (the reference genome available has changed since the paper was originally published), and then use TopHat to map to that reference. We use the two parameters set by the authors: --segment-mismatches, which sets the number of allowable mismatches for segments being aligned, and --segment-length, which specifies the size of the segments that the transcriptomic data is split into during alignment (recommended to be set to half of the read length).
Then, we copy the output to the place we'd like it stored. If we're running this in parallel, we need to rely on the -o output directory specification included in the command.
workflow() {
    local f = $1
    # Build bowtie index for the genome
    bowtie2-build ~/Danio_rerio.GRCz11.dna_rm.toplevel.fa ~/Danio_rerio.GRCz11.dna_rm.toplevel
    tophat ~/Danio_rerio.GRCz11.dna_rm.toplevel ~/ncbi_bvcn/"$f"_prinseq_1.fastq  ~/ncbi_bvcn/"$f"_prinseq_2.fastq --segment-mismatches 1 --segment-length 18 --no-coverage-search -o ~/bvcn_workflow_res/tophat-bvcn-"$f"
    [ -d "~/bvcn_workflow_res/tophat-bvcn-$f" ] && [ mkdir ~/bvcn_workflow_res/tophat-bvcn-"$f" ]
    cp tophat_out/accepted_hits.bam ~/bvcn_workflow_res/tophat-bvcn-"$f"/accepted_hits.bam
}
Assembling into transcripts with Cufflinks
Cufflinks is a tool used for transcript assembly and differential expression analysis.
The aligned reads were assembled into transcripts using Cufflinks (version 2.0.2) [76] with the following parameters “--frag-bias-correct, --multi-read-correct, --library-type fr-unstranded, --upper-quartile-norm, --total-hits-norm”
frag-bias-correct is a parameter telling Cufflinks to run a bias correction algorithm, multi-read-correct is a parameter that tells Cufflinks to do an initial step beforehand to check whether a read maps to multiple locations in the genome. The library type needs to be specified, which in this case is unstranded forward reads, and --upper-quartile-norm specifies that normalization, which is normally divided by the total number of fragments, is instead done relative to th eupper quartile of mapped fragments. --total-hits-norm is on by default, and means that even if a fragment doens't work with a reference, it is included in the denominator of the FPKM calculation. FPKM is the end output of differential expression analysis, Fragments Per Kilobase of transcript per Million, which is a normalized metric for how highly expressed a gene is.
workflow() {
    local f = $1
    cufflinks --frag-bias-correct --multi-read-correct --library-type fr-unstranded --upper-quartile-norm --total-hits-norm -o ~/bvcn_workflow_res/cufflinks-bvcn-"$f" ~/bvcn_workflow_res/tophat-bvcn-"$f"/accepted_hits.bam
}
Assembled transcripts + reference = merged assembly with cuffmerge
cuffmerge is just used to mash together all the assembled transcripts generated by Cufflinks. This is where our parallelized workflow ends; we're only run these steps once, because we're merging and performing calculations on all of our output from before.
The assembled transcripts were merged with the reference annotation (Danio_rerio.Zv9.68.gtf, downloaded from Ensembl) using cuffmerge
So we'll just make a text file containing the names of all the Cufflinks outputs, plus the reference genome, and feed that text file as an argument to cuffmerge.
ls -1 ~/bvcn_workflow_res/cufflinks-bvcn-*/transcripts.gtf > cuffmergefiles.txt # Write line-separated list of files a file that cuffmerge can work with
ls ~/Danio_rerio.GRCz11.99.gtf >> cuffmergefiles.txt # Write line-separated list of files a file that cuffmerge can work with
cuffmerge cuffmergefiles.txt
Differential expression analysis with cuffdiff
Finally, everything is linked together using cuffdiff, a tool for differential expression analysis. These parameters should be familiar; as input we use the output we just got from cuffmerge, along with the aligned reads from TopHat, so that we can compare the expression of the transcripts in each sample to the overall expression of the combined assembly mapped against the reference genome.
Differential expression analysis was performed using cuffdiff with the parameters “--upper-quartile-norm” and “--total-hits-norm”; the merged assembly and the fragment alignments generated by TopHat were used as input files.
cuffdiff --upper-quartile-norm --total-hits-norm -o ~/bvcn_workflow_res/cuffdiff ~/bvcn_workflow_res/merged.gtf ~/bvcn_workflow_res/tophat-bvcn-*/accepted_hits.bam
Actually implementing with SLURM
So ultimately, I ended up implementing this using separate calls to sbatch within one SLURM script. That makes it so that you can open up all your output from each job in a separate sbatch output file. To do this, you still have a loop like this:
# parallelize loop
for f in $zebrafishaccessions
do
    sbatch --export=SRANAME="$f" --job-name="zebras.$f.run" diffexpn.sh
done
Which is still a parallelized loop, but instead we submit a separate job to SLURM for each zebrafish transcriptome. We name each job according to the name of the zebrafish RNAseq accession number. This separate script runs our commands from PRINSEQ to Cufflinks.
There's another step, though. Before we can run cuffmerge and cuffdiff, we need to wait for all of these SBATCH jobs that we have spawned to complete. Because we're running them using the HPC and not locally, they don't count as "child processes" or spawns of the current process that can be traced back and tended to (you can use the wait command to mind your children). Instead, we'll write another small block of code for the main script to check for jobs named "zebras", and tell the script not to proceed until no jobs of this name are in the running list:
while true;
do
    sleep 10 # wait for 10 seconds so we're not checking constantly
    sacct -s R | grep "zebras" > outgrep.txt # write the output of job status checker to a file
    if [[ ! -s outgrep.txt ]] # if the file is empty (there are no jobs)
    then
    echo "found no running jobs left"
    break;
    fi
done;